Introduction
This guide explains how to clean and maintain camera‑equipped bird feeders so that lenses stay clear, birds remain healthy, and video footage remains reliable. Readers will learn practical, step‑by‑step procedures, discover essential tools, and understand why regular upkeep prevents common problems such as blurry streams or seed spoilage. The instructions apply to a range of smart feeders, including models with solar power, AI identification, and removable cameras. By following these recommendations, one can enjoy uninterrupted wildlife observation while extending the lifespan of the equipment.
What You’ll Need
- Soft microfiber cleaning cloth
- Isopropyl‑based lens cleaner (70% or less)
- Small soft‑bristle brush
- Mild dish soap and warm water
- Rubber gloves
- Dry paper towels
- Optional: Replacement batteries for solar‑powered units
For convenience, one may also use a smart feeder that offers easy camera removal, such as the Humbirdy Smart Bird Feeder, which simplifies cleaning of the lens and internal components.
Step‑by‑Step Instructions
Step 1: Prepare Your Workspace and Safety Gear
Begin by selecting a flat, well‑lit surface where the feeder can be placed safely. Wear rubber gloves to protect hands from seed residues and to maintain hygiene. Disconnect the feeder from any power source; for solar models, cover the solar panel with a cloth to avoid accidental short‑circuits. This preparation reduces the risk of damage and ensures that all components are accessible for cleaning.
Using a sturdy feeder such as the HARYMOR Smart Bird Feeder is advantageous because its robust IP65‑rated funnel keeps moisture away from the interior during cleaning, protecting electronic parts.
Step 2: Disassemble the Feeder for Access
Remove the seed hopper by unlocking the latch or unscrewing the top, depending on the model. Detach any feeding trays, water bowls, or accessory trays to expose the camera housing. For feeders with a detachable camera, such as the Humbirdy Smart Bird Feeder, pull the camera out gently; this design eliminates the need to clean around a fixed lens.
Place each component on a clean towel to prevent scratches. Keep screws and small parts in a container so they are not lost during the cleaning process.
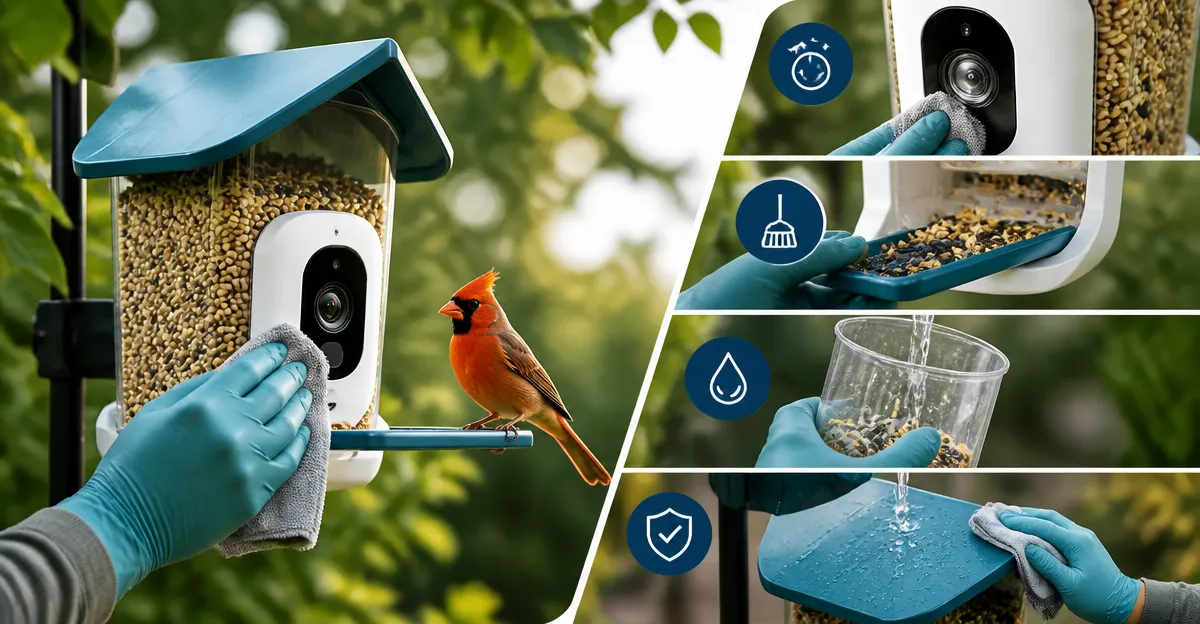
Step 3: Clean the Lens and Camera Housing
Apply a few drops of isopropyl‑based lens cleaner to a microfiber cloth—never spray directly onto the lens. Wipe the lens in a circular motion, starting from the center and moving outward, to remove fingerprints, dust, and bird droppings. For stubborn residues, let the cloth sit for a few seconds before wiping again.
The removable camera of the Humbirdy Smart Bird Feeder makes this step quick and safe; the camera can be fully cleaned without disassembling the feeder housing, reducing the chance of water intrusion.
Step 4: Clean the Seed Hopper and Feeding Ports
Empty any remaining seed into a bowl and discard stale or moldy portions. Fill a basin with warm, soapy water and submerge the hopper. Use a soft‑bristle brush to scrub interior walls, removing dried seed and debris. Rinse thoroughly with clean water and dry completely with paper towels before reassembly.
Inspect feeding ports for blockages; the M‑Guard design of the Humbirdy Smart Bird Feeder prevents seeds from entering the camera compartment, but regular checks ensure the guard remains functional.
Step 5: Inspect and Clean Solar Panels and Batteries
Wipe solar panels with a dry microfiber cloth to remove dust and bird droppings that could reduce efficiency. For panels with a protective coating, such as the onlyfly Smart Bird Feeder, avoid abrasive cleaners that might scratch the surface.
If the feeder uses a rechargeable battery, check the voltage with a multimeter. Replace batteries that show reduced capacity, especially in regions with limited sunlight. The dual‑solar design of the onlyfly Smart Bird Feeder provides redundancy, but keeping both panels clean maximizes charging time.
Step 6: Reassemble, Test Connectivity, and Calibrate Alerts
Reattach all components, ensuring latches click securely and seals are intact to maintain the IP‑rated waterproofing. Power the feeder back on and open the associated app to verify live video feed. Adjust camera angle if necessary; many models, including the NAVFS Smart Bird Feeder & Bird Bath, allow remote pan/tilt via the app.
Run a quick test by placing a small treat near the sensor to trigger a motion alert. Confirm that the notification includes a clear snapshot, indicating that the lens and sensor are functioning correctly.
Step 7: Schedule Regular Maintenance
Establish a cleaning routine based on local climate and feeder usage. In humid regions, clean the lens and hopper weekly; in drier areas, bi‑weekly cleaning may suffice. Mark the calendar with reminders to inspect solar panels after heavy rain or snowfall.
Document maintenance dates in a notebook or digital log; this practice helps track component wear and predicts when parts such as the battery or camera may need replacement.
Tips & Pro Tips
- Use a soft brush rather than metal tools to avoid scratching the camera lens.
- When cleaning in direct sunlight, work quickly to prevent condensation on electronic parts.
- Apply a thin layer of silicone spray to the solar panel’s edge to repel water, but avoid spraying the active surface.
- For bird‑friendly hygiene, rinse the seed hopper with a solution of one part vinegar to three parts water, then rinse thoroughly.
- Consider adding a small rain guard over the solar panel if the feeder is placed under dense foliage.
Troubleshooting
- Blurry video after cleaning: Ensure the lens is completely dry; any residue from cleaning solution can cause haze.
- No motion alerts: Verify that the motion sensor is not obstructed by seed debris; clean the sensor window with a dry cloth.
- Wi‑Fi disconnects frequently: Position the feeder within 15 feet of the router or use a Wi‑Fi extender; dual‑band models like the Humbirdy Smart Bird Feeder benefit from 5 GHz stability.
Conclusion
By following these systematic steps, one can keep camera‑equipped bird feeders operating at peak performance, ensuring crystal‑clear footage and a safe feeding environment for birds. Regular cleaning, careful inspection of solar components, and timely maintenance extend the life of both hardware and battery, while the AI identification features continue to deliver accurate species data. Implement the schedule outlined above, and enjoy endless backyard birdwatching with confidence.
Products Mentioned in This Guide
Frequently Asked Questions
How often should I clean the camera lens on a smart bird feeder?
Clean the lens at least once a month, or sooner if you notice dust, water spots, or blurry video.
What cleaning supplies are safe for the camera lens?
Use a soft microfiber cloth with a 70% or lower isopropyl‑based lens cleaner; avoid abrasive materials or high‑alcohol solutions.
Can I clean the camera without removing it from the feeder?
If the feeder offers a removable camera module, detach it for thorough cleaning; otherwise, gently wipe the lens through the housing opening.
How do I maintain the feeder’s battery or solar panel while cleaning?
Turn off the unit, disconnect any batteries, and wipe the solar panel with a dry cloth before cleaning the rest of the feeder.
Why does video become blurry after a rainstorm, and how can I prevent it?
Moisture can fog the lens; regularly dry the lens with a paper towel and apply a water‑repellent coating designed for optics.