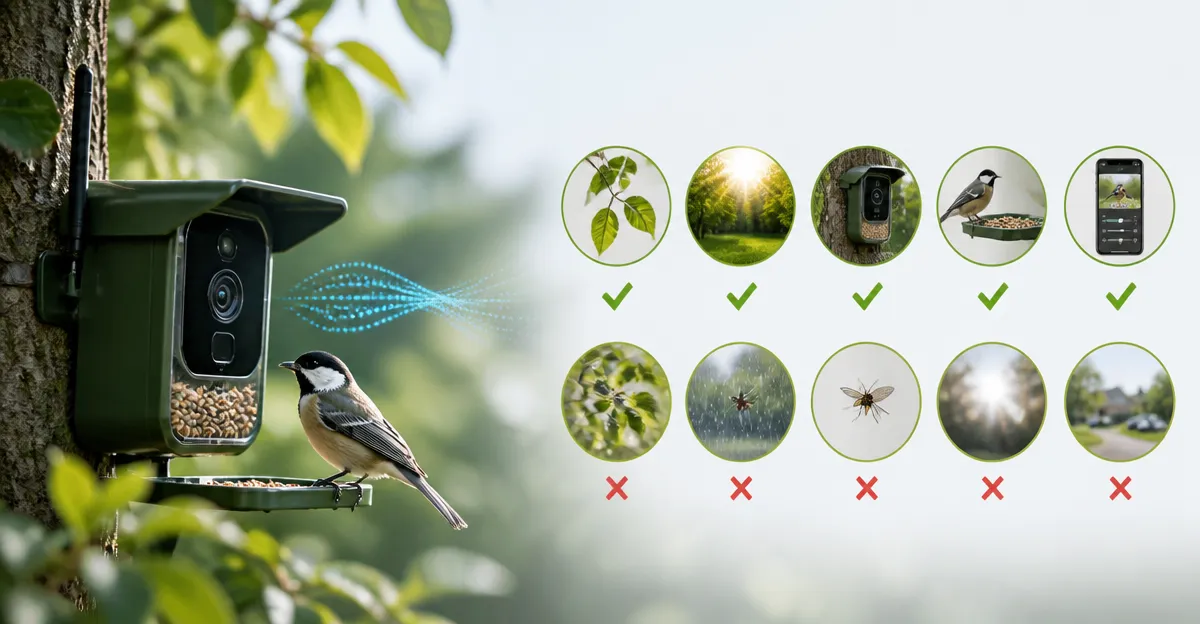
How to Reduce False Triggers on Bird Camera Motion Detection: 10 Proven Tips to Cut False Alarms and Improve Accuracy
Introduction
Motion detection is a cornerstone of modern bird‑camera systems, yet many users experience frequent false triggers caused by wind‑blown foliage, passing insects, or sudden changes in lighting. This guide explains ten proven techniques that minimise erroneous alerts while preserving the ability to capture genuine avian activity. By following these steps, readers will obtain clearer video, conserve battery life, and enjoy a more satisfying bird‑watching experience.
The recommendations combine best‑practice configuration with specific hardware tools that enhance performance. Although the guide remains valuable without additional purchases, certain products listed in the "What You’ll Need" section provide convenient solutions for common challenges such as glare reduction, stable mounting, and precise motion zoning.
Each tip is presented as a discrete step, complete with actionable instructions, rationale, and product suggestions drawn from reputable Amazon listings. Readers will finish the article with a comprehensive toolkit for reliable motion detection.
What You’ll Need
- Smart bird‑camera with adjustable motion zones (e.g., HARYMOR Smart Bird Feeder Camera)
- Solar‑powered or battery backup to maintain consistent power
- Weather‑proof mounting hardware (pole, strap, or bracket)
- Neutral‑density or polarising filter to reduce glare
- Micro‑SD card (128 GB or larger) for local storage
- Smartphone or tablet with the companion app installed
Step 1: Position the Camera Away from Direct Sunlight
Direct sunlight creates high‑contrast shadows that the motion algorithm often misinterprets as movement. Install the camera so that the sun strikes the feeder from an angle rather than head‑on. Early morning or late‑afternoon placement typically yields the most balanced illumination.
When a device such as the HARYMOR Smart Bird Feeder Camera is used, its 120° wide‑angle lens captures a broad scene; orienting the lens toward the shade side of the feeder reduces glare while still providing a clear view of feeding activity.
The camera features built‑in AI that can differentiate birds from background motion, yet excessive brightness overwhelms the sensor, leading to false alerts. By shading the lens naturally with foliage or a small umbrella, users protect the sensor without compromising visibility.
This step does not require additional equipment, but a simple garden umbrella or a portable shade cloth can be employed if natural shade is unavailable.
Step 2: Adjust Motion Sensitivity Settings
Most bird‑camera apps allow users to set a sensitivity level for motion detection. Begin with a medium setting and test the system for 24 hours. If false alerts persist, lower the sensitivity incrementally until the number of unwanted triggers declines.
The HARYMOR model provides a slider within the Vicohome app that adjusts detection thresholds. Because the device employs AI to recognise over 10,000 bird species, a lower sensitivity still captures genuine avian visits while ignoring minor disturbances such as rustling leaves.
Remember to save changes after each adjustment; some apps require a brief reboot of the camera to apply new parameters.
Document the chosen setting for future reference, especially after firmware updates that may reset preferences.
Step 3: Define Precise Motion Zones
Modern bird cameras allow users to draw custom motion zones within the app, limiting detection to the feeder area only. Open the app, select the camera, and use the on‑screen tools to outline a rectangular or polygonal region that encompasses the seed tray and perch.
By restricting the detection field, the camera ignores peripheral movement such as squirrels on nearby branches or wind‑blown debris. The HARYMOR camera’s AI further refines detection within the defined zone, improving species identification accuracy.
After configuring zones, monitor the feed for a full day to confirm that birds are still captured while extraneous motion is ignored.
If occasional false triggers remain, consider narrowing the zone further or adding a secondary zone that excludes problematic areas.
Step 4: Install a Physical Shield or Hood
A simple physical shield can block stray light and protect the lens from rain droplets that sometimes trigger motion detection. Attach a small hood made from matte black plastic or a weather‑resistant fabric to the camera housing.
The RichBird Solar Bird Camera includes a rain shield as part of its all‑inclusive kit, demonstrating the utility of an integrated protective element. The shield reduces glare and prevents water droplets from refracting light onto the sensor, both of which are common sources of false alerts.
When installing the shield, ensure it does not obstruct the 150° ultra‑wide lens. A slight offset maintains a clear view while still providing the desired protection.
Regularly inspect the shield for accumulated debris and clean it with a soft cloth to preserve image clarity.
Step 5: Use a Neutral‑Density or Polarising Filter
Filters are especially useful in bright environments where the sun creates reflective hotspots. A neutral‑density (ND) filter reduces overall light intensity, while a polarising filter eliminates reflections from wet foliage or glass surfaces.
Although the HARYMOR camera does not ship with a filter, third‑party 2‑inch ND filters can be threaded onto the lens using a simple adapter. This addition lowers the sensor’s exposure, decreasing the likelihood that sudden brightness spikes will be misread as motion.
Choose a filter with a 0.6‑stop reduction for moderate sunlight or a 1.2‑stop reduction for very bright conditions. The filter should be easily removable for low‑light evenings when maximum sensitivity is desired.
Applying a filter is a low‑cost investment that yields a noticeable reduction in false triggers during midday observations.
Step 6: Secure Stable Mounting to Eliminate Vibration
Vibrations caused by wind or passing traffic can cause the camera housing to shift, creating motion that the sensor interprets as activity. Mount the camera on a sturdy pole, wall bracket, or ground‑mounted post using the hardware supplied with the device.
The RichBird kit includes a 2‑in‑1 ground mounting pole and all necessary bolts, ensuring a rigid installation. The pole’s rubber base absorbs minor vibrations, while the metal clamp secures the camera firmly.
After installation, test the stability by gently shaking the mount; the camera should remain immobile. If any wobble is detected, tighten all screws and consider adding a secondary brace.
Secure mounting not only reduces false alerts but also protects the camera from accidental falls during storms.
Step 7: Optimize Wi‑Fi Placement and Signal Strength
Unstable Wi‑Fi connections cause the camera to repeatedly reconnect, which can be logged as motion events. Position the router within 10 meters of the camera and avoid physical obstructions such as thick walls or metal fences.
Both the HARYMOR and Coolfly models operate on 2.4 GHz bands; they do not support 5 GHz, making signal range more critical. If the signal is weak, use a Wi‑Fi extender or a dedicated outdoor antenna, similar to the 5 dBi external antenna included with the HARYMOR unit.
After improving signal strength, monitor the app for a full day to verify that reconnection events have ceased.
Consistent connectivity also ensures that real‑time alerts are delivered promptly, enhancing the overall user experience.
Step 8: Enable Cloud Storage with Loop Recording
Local storage on a micro‑SD card can fill quickly, causing the camera to overwrite recent footage and potentially generate false motion alerts when the file system resets. Enabling cloud storage with a short loop (e.g., three‑day loop) prevents this issue.
The HARYMOR camera offers three‑day loop recording and a two‑year trial for cloud backup. By storing footage remotely, the device maintains continuous recording without the need for frequent manual card swaps.
When cloud storage is active, the camera can focus on detection rather than file management, reducing the chance of false alerts triggered by storage errors.
Ensure that the subscription plan is active if you intend to keep cloud storage beyond the trial period.
Step 9: Calibrate Night‑Vision Settings
Infrared (IR) LEDs can illuminate moving objects at night, causing the motion sensor to fire on every passing insect. Adjust the night‑vision mode to colour night vision, if available, or reduce IR intensity.
The RichBird camera provides full‑colour night vision, which distinguishes birds from background noise more effectively than monochrome IR. If using a model without colour night vision, lower the IR brightness in the app settings.
After adjusting, test the night mode for at least two hours to confirm that only substantial movement (such as a bird landing) generates alerts.
Proper night‑vision calibration extends battery life and prevents a flood of nighttime false triggers.
Step 10: Perform Regular Firmware Updates
Manufacturers frequently release firmware that refines motion‑detection algorithms and fixes bugs that cause spurious alerts. Check the companion app weekly for update notifications.
Both the HARYMOR and Coolfly cameras have a dedicated “Firmware Update” section within their apps. Initiate the update while the camera is connected to power, and allow the process to complete without interruption.
After updating, re‑evaluate the sensitivity and zone settings, as the new firmware may alter default thresholds.
Staying current with firmware ensures that users benefit from the latest AI improvements and reduced false‑trigger rates.
Tips & Pro Tips
- Combine multiple strategies—such as shading, zone definition, and sensitivity adjustment—for optimal results.
- Schedule a weekly review of alert logs to identify patterns (e.g., specific wind directions) and adapt placement accordingly.
- Use the app’s “test motion” feature, if available, to preview how changes affect detection before committing to a permanent setup.
- When installing solar panels, angle them toward the sun’s path to maximise charge while avoiding direct glare on the camera lens.
- Consider a secondary “dummy” feeder placed out of view to distract squirrels and reduce feeder‑related motion.
Troubleshooting
Problem: Camera continues to send alerts despite adjustments.
Solution: Verify that the motion zone does not include moving foliage. Reduce sensitivity to the lowest level, then increase incrementally only if bird captures are missed.
Problem: Night‑time alerts flood the inbox.
Solution: Switch from IR to colour night vision (RichBird) or lower IR intensity in the app. Ensure the camera’s lens is clean of dew or condensation.
Problem: Frequent Wi‑Fi disconnections.
Solution: Relocate the router or add a Wi‑Fi extender. Use the external 5 dBi antenna supplied with the HARYMOR camera for stronger signal reception.
Conclusion
Reducing false triggers on bird‑camera motion detection requires a systematic approach that blends proper placement, thoughtful configuration, and occasional hardware enhancements. By following the ten steps outlined above, users will experience fewer unnecessary alerts, longer battery life, and clearer footage of the birds they cherish.
The techniques presented are applicable to a wide range of smart bird cameras, yet the specific product recommendations—such as the HARYMOR Smart Bird Feeder Camera, RichBird Solar Bird Camera, and Coolfly Smart Bird Camera—provide proven tools that simplify implementation.
Implement the adjustments gradually, monitor results, and enjoy a more reliable bird‑watching experience that brings nature closer to the home without the distraction of false alarms.
Products Mentioned in This Guide
Frequently Asked Questions
What causes false triggers on bird cameras?
Wind‑blown leaves, insects, sudden light changes, and reflective surfaces often generate motion that the sensor misinterprets as birds.
How can I adjust motion sensitivity to reduce false alarms?
Lower the sensitivity setting in the camera’s firmware and use a higher detection threshold so only larger movements trigger recording.
Is it better to use a specific mounting method to avoid false triggers?
Mount the camera on a stable, vibration‑free pole or bracket and aim it away from moving foliage to minimize background motion.
Can adding a glare shield or lens filter help?
Yes, a polarizing or anti‑glare filter reduces reflections and sudden brightness shifts that can cause spurious alerts.
What role does motion zoning play in preventing false triggers?
Motion zoning lets you define active detection zones, ignoring peripheral areas where wind or insects are common while focusing on the bird‑rich region.