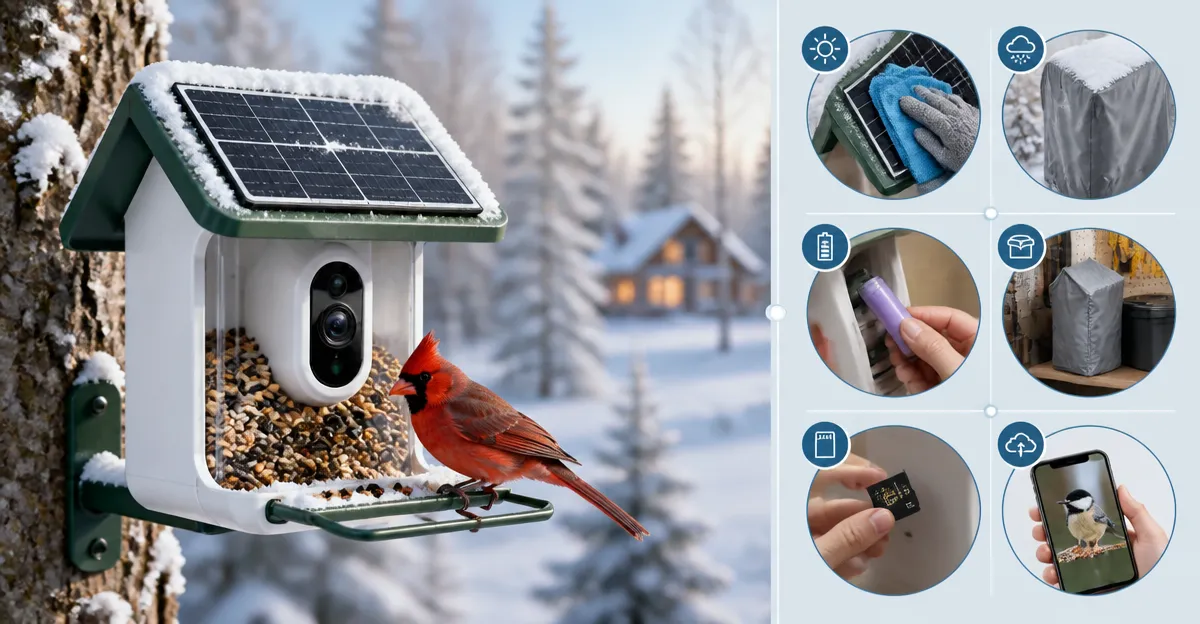
How to Winterize Your Solar Bird Feeder Camera: Step-by-Step Tips to Protect Panels, Batteries, and Footage in Cold Weather
Introduction
Winter weather presents unique challenges for solar‑powered bird‑watching equipment. In this guide, one will learn how to safeguard the solar panel, preserve the battery life, and maintain clear video footage when temperatures drop below freezing. Understanding these steps will extend the lifespan of the feeder, reduce the need for costly repairs, and ensure that cherished bird‑watching moments continue uninterrupted throughout the cold season.
The instructions are designed for intermediate hobbyists who already have a functioning solar bird feeder camera. The guide references specific products that simplify each task, yet the techniques remain effective even without purchasing additional tools. By following the procedures, one can enjoy reliable feeding and observation well into the heart of winter.
What You'll Need
- Soft brush or microfiber cloth for cleaning solar panels
- Silicone weather‑proof sealant
- Insulating sleeve or foam wrap for battery protection
- Adjustable mounting brackets (optional)
- Power‑bank or external charger for emergency power
- HEAPETS Smart Bird Feeder Camera – primary device to be winterized
- DesGully Solar Bird Feeder – useful for comparing panel size and mounting options
Step 1: Clean and Protect the Solar Panel
The first priority is to ensure that the solar panel receives maximum sunlight despite snow, ice, or dust accumulation. Using a soft brush, gently remove loose debris from the panel surface. For stubborn grime, a damp microfiber cloth can be employed, but never apply excessive pressure that might crack the protective glass.
After cleaning, apply a thin layer of silicone weather‑proof sealant around the panel edges. This sealant creates a barrier against moisture ingress while remaining flexible in cold temperatures. The sealant is especially valuable for the HEAPETS Smart Bird Feeder Camera because its integrated panel is exposed to the elements and any water intrusion can degrade the rechargeable battery.
Why this product? The HEAPETS model includes a built‑in 2K HD camera and a solar panel that powers the unit for up to 8‑10 hours on a full charge. Its rating of 4.3 out of 5 stars from 1,355 reviews indicates reliable performance, and the price of $59.99 makes it an affordable centerpiece for winterization.
Complete the step by positioning the panel at a 45‑degree angle toward the sun, using the adjustable mounting brackets if necessary. This orientation reduces snow buildup and improves charge efficiency during short winter days.
Step 2: Insulate the Battery Compartment
Solar‑powered feeders rely on internal lithium‑ion batteries that lose capacity rapidly in sub‑zero temperatures. To mitigate this loss, wrap the battery compartment with an insulating sleeve made of closed‑cell foam. Secure the sleeve with heat‑resistant tape, ensuring that vents remain unobstructed.
For those who own the DesGully Solar Bird Feeder, the same insulating principle applies. The DesGully feeder’s heavy‑duty metal construction and IP55 rating allow the addition of a foam wrap without compromising structural integrity. The feeder is priced at $17.99, carries a 4.5‑star rating from 6,112 reviews, and includes a rechargeable battery that lasts 8‑10 hours, making it a cost‑effective example for battery protection.
Why this product? The DesGully feeder’s robust metal body and rust‑proof finish provide a stable platform for adding insulation, while the built‑in lantern function demonstrates the importance of preserving both light and power sources during winter.
After wrapping, perform a brief charge cycle on a sunny day to verify that the insulation does not impede solar input. If the charge level remains above 70 % after a full day, the insulation is correctly installed.
Step 3: Shield the Camera Lens from Frost and Condensation
Clear video footage depends on an unobstructed lens. In cold weather, condensation can form on the glass, creating blurry images. Install a small anti‑fog shield made of acrylic or polycarbonate over the lens. The shield should be slightly larger than the lens diameter and attached with removable clips.
When using the HEAPETS Smart Bird Feeder Camera, the built‑in acrylic cover already provides some protection, but an additional external shield offers redundancy during heavy frost. The camera’s 2K HD resolution and AI bird‑identification feature are most valuable when the image is sharp; any fog reduces the AI’s ability to correctly identify species.
Why this product? The HEAPETS unit’s AI recognition supports over 10,000 species, and maintaining a clear lens maximizes the benefit of that technology. The camera’s weather‑proof design, rated for rain and snow, still benefits from a lens shield during extreme temperature swings.
Finally, apply a thin coat of anti‑condensation spray to the shield’s interior surface. This chemical treatment reduces surface tension, preventing water droplets from adhering to the glass.
Step 4: Secure Mounting and Prevent Ice Accumulation
Ice buildup on the hanging chain or hook can cause the feeder to sway or even detach. Replace thin chains with a thicker, stainless‑steel cable that can support up to 30 lb, as specified for the DesGully models. Tighten all knots and use a lock‑nut to prevent loosening from temperature contraction.
Both the DesGully Solar Bird Feeder and the HEAPETS Smart Bird Feeder Camera feature sturdy suspension hooks capable of bearing significant weight. The DesGully feeder’s heavy‑duty all‑weather design includes thick chains and hooks rated for 30 lb, ensuring that the feeder remains stable even when ice adds extra load.
Why these products? The DesGully feeder’s rust‑proof metal and IP55 rating allow it to withstand hose cleaning, indicating that it can also endure winter moisture without corrosion. The HEAPETS camera’s solar panel is integrated into the housing, so a secure mount prevents the panel from being knocked off by wind‑driven ice.
After securing the mount, attach a small windbreak made from burlap or a garden fabric to the feeder’s backside. This barrier reduces wind chill on the solar panel and battery, improving overall efficiency.
Step 5: Verify Power Management Settings and Schedule Maintenance
Modern feeder cameras include power‑saving modes that limit operation during low‑light conditions. Access the companion app for the HEAPETS Smart Bird Feeder Camera and enable the “Winter Mode” if available. This mode reduces video streaming bitrate and extends battery life while still delivering motion alerts.
Set a maintenance schedule to inspect the feeder weekly. During each visit, repeat the cleaning of the solar panel, check the insulation integrity, and ensure the lens shield remains clear. Record any changes in battery charge time; a significant drop may indicate the need for a replacement battery.
Why this product? The HEAPETS feeder’s AI bird‑recognition and real‑time alerts are most useful when the device remains online. Adjusting power settings prevents unexpected shutdowns during critical bird‑watching periods.
Keep a portable power‑bank on hand as a backup source. In case of prolonged cloudy weather, the power‑bank can supply the feeder for several days, ensuring that the camera continues to capture rare winter visitors.
Tips & Pro Tips
- Apply a thin coat of white, non‑reflective paint to the underside of the solar panel to increase albedo and improve light absorption on overcast days.
- Use a digital thermometer to monitor the battery compartment temperature; aim to keep it above 0 °C for optimal performance.
- Place a small heat‑reflective blanket behind the feeder to capture residual warmth from the sun and radiate it back during night hours.
- When heavy snowfall is expected, temporarily relocate the feeder to a sheltered spot, such as a covered porch, to prevent panel damage.
- Enable two‑user access in the app so a family member can monitor alerts while you are away, reducing the risk of missed maintenance.
Troubleshooting
Problem: Camera feed is intermittently offline during cold nights.
Solution: Verify that the battery insulation is not obstructing the solar panel. Remove excess foam if it covers more than 10 % of the panel surface. Also, check the app’s power‑saving settings and disable any overly aggressive sleep timers.
Problem: Lens appears fogged despite anti‑condensation spray.
Solution: Install a small vent near the top of the housing to allow air exchange while keeping moisture out. Ensure the vent is covered with a fine mesh to prevent insect entry.
Problem: Solar panel does not charge on sunny days.
Solution: Inspect the panel for micro‑cracks or debris that may block light. Clean with a soft brush and re‑apply silicone sealant if the seal appears compromised.
Conclusion
By following the five detailed steps, one can effectively winterize a solar bird feeder camera, protecting the solar panel, preserving battery capacity, and maintaining crystal‑clear footage throughout the cold season. Regular maintenance, proper insulation, and strategic positioning ensure that the feeder remains a reliable source of nourishment for birds and a source of joy for observers. Implement these practices now, and enjoy uninterrupted bird‑watching even when winter storms arrive.
Products Mentioned in This Guide
Frequently Asked Questions
How can I protect the solar panel from snow and ice buildup?
Gently brush off snow with a soft brush and apply a thin layer of silicone weather‑proof sealant to repel moisture.
What is the best way to keep the battery warm in sub‑freezing temperatures?
Wrap the battery in an insulating sleeve or foam wrap and place it in a shaded, wind‑protected spot.
Do I need to adjust the camera angle for winter daylight changes?
Yes, tilt the camera slightly lower to capture shorter winter days and ensure the panel stays angled toward the sun.
How often should I clean the solar panel during winter?
Clean the panel weekly or after any snowfall to maintain optimal power output.
Can I winterize the feeder without buying extra accessories?
Absolutely; use household items like a microfiber cloth, silicone sealant, and DIY foam from packaging to protect the equipment.